
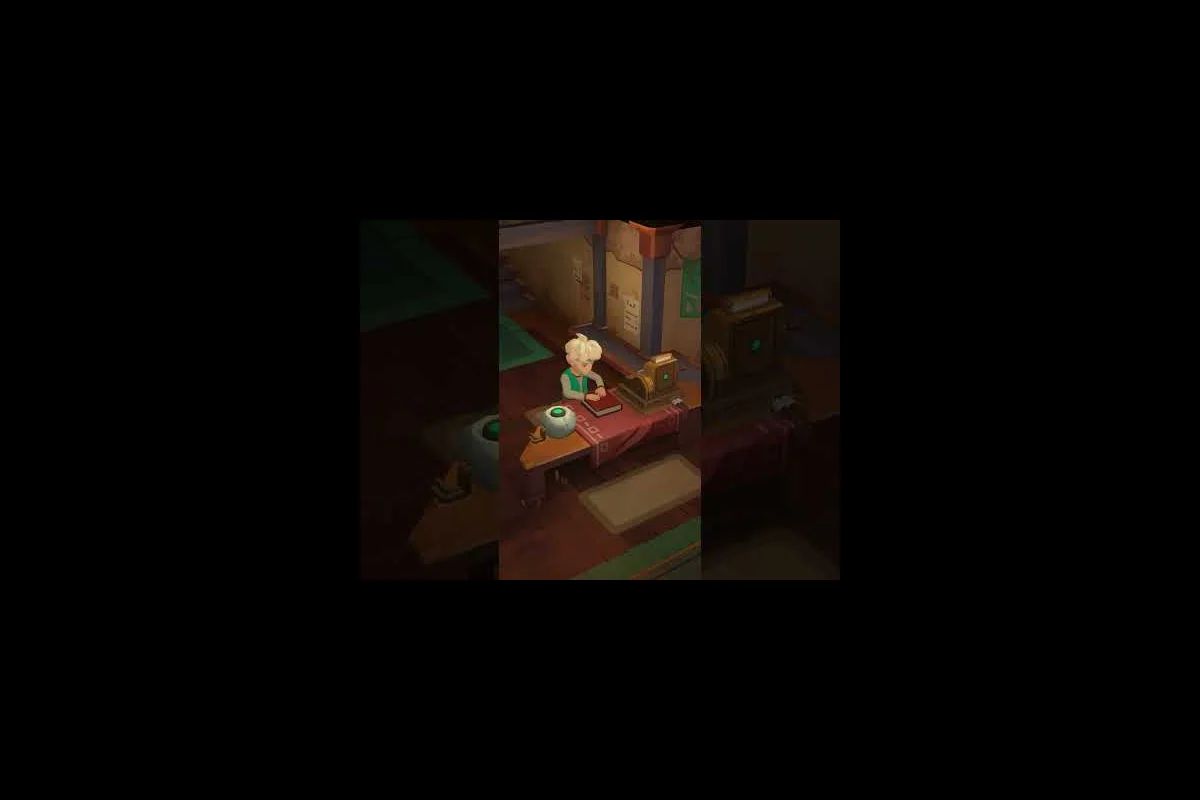
The Moonlighter 2 shop is no longer a side errand between dungeon dives — it is the economic engine that decides whether your next vault run funds a brand-new weapon or leaves you scraping for potions. Every relic you haul back to Tresna has a Perfect Price waiting to be discovered, and finding it is the difference between a thriving merchant and a struggling one. Getting that loop right means understanding pricing tiers, shelf strategy, customer behavior, and the perk economy that surrounds your counter.
The Moonlighter 2 Shop Loop and Why It Matters
Shopkeeping in Moonlighter 2 is built on a tight daily rhythm: clear a vault, return to Tresna, open the shutters, and let the townsfolk judge your inventory. The official Moonlighter 2 page on Steam describes how players set prices, watch customer reactions, and learn to price relics across four tiers — Cheap, Perfect, Expensive, and Overpriced — to maximize profit. That four-step pricing scale is the heart of the Moonlighter 2 shop system, and every decision you make in the dungeon eventually feeds back into it.
Why does this loop matter? Because the Moonlighter 2 shop is the single largest source of gold in the early-to-mid game. Dungeon drops alone cannot fund town upgrades, gear repairs, or the rarer blueprints you will need to push deeper. A well-run shop can double the value of a single vault run in under one in-game day, which compounds across the entire campaign. A poorly managed one bleeds gold through Overpriced stamps and angry customers walking out the door.
The basic cadence looks like this: open the shop shutters at dawn, sort and price your vault haul using the four-tier Moonlighter 2 pricing scale, watch the Perfect Price stamp appear on relics you have priced within the hidden sweet-spot range, adjust the underperformers upward, and close the shutters at night to spend profits at the upgrade vendors. The speed at which you cycle through this loop — and how cleanly you read each Perfect Price confirmation — is what separates a struggling Tresna shopkeeper from one who can bankroll the Endless Vault within the first ten in-game days.
-
Morning: Sort your vault haul, decide what stays on the shelf and what gets recycled.
-
Midday: Open the shop, watch customer reactions, and adjust prices mid-shift.
-
Afternoon: Reorder shelves, swap under-performing relics, and lock in your Perfect Price inventory.
-
Evening: Close the shutters, spend profits on upgrades, and prep for the next dive.
The four pricing tiers are the dial you turn every shift, and they are not equally forgiving. Pricing a relic Cheap will always sell, but it leaves gold on the table. Pricing it Expensive or Overpriced will frustrate customers, hurt your reputation, and sometimes block the sale entirely. The Perfect Price stamp — that red confirmation you see when the price is exactly right — is the only tier that maximizes profit while keeping the customer happy. Learning to land it consistently is the entire Moonlighter 2 shop guide in one mechanic.
| Pricing Tier | Customer Reaction | Gold Outcome | Reputation Effect |
|---|---|---|---|
| Cheap | Always buys | Lowest payout | Neutral |
| Perfect | Always buys, smile reaction | Maximum payout | Positive |
| Expensive | Sometimes buys, hesitant | Moderate payout, risk of refusal | Slight negative |
| Overpriced | Refuses to buy, leaves | No sale | Negative |
Players who treat the Moonlighter 2 shop as a secondary system tend to underprice everything out of caution. Players who treat it as a core system learn to read the Perfect Price stamp as a skill check — one that rewards pattern recognition and patience. The Greed & Glory update, according to Steam News for Moonlighter 2, expanded these shop systems with new perks, pricing options, and even a shopkeeping contest, which means the loop has more levers to pull than at launch.
Pricing Relics: The Four-Tier System in Practice
The Moonlighter 2 pricing guide is built around the red Perfect Price stamp that appears when a relic's listed price matches the customer's internal valuation. According to the Steam community guides, this stamp is the main driver of shop profit and the single most important visual signal during a shift. Everything else — perks, aromas, decorations — is a multiplier on top of how well you price your relics.
Reading the Perfect Price Stamp
The Perfect Price feedback loop works in real time. When a customer walks up to a shelf, they pause, glance at the price tag, and either nod, frown, or turn away. The red stamp confirms the price is correct; the lack of a stamp means the price is off. Community testing suggests that most relics have a narrow band of acceptable prices — typically within a 5-10% window of their base value — and the stamp will only appear inside that band.
This is where the Moonlighter 2 price list becomes useful. A price list is essentially a cheat sheet you build over time: as you discover the Perfect Price for a relic, you record it. After a few shifts, your list covers most of the common drops, and pricing becomes almost automatic. According to community data, veteran players maintain a personal price list of 30-50 relics by mid-game, which covers the majority of their daily inventory.
How the Four Tiers Stack Up
The four-tier pricing system is not just a flavor mechanic — it has measurable consequences that ripple through every shift in the moonlighter 2 shop, from gold-per-hour averages to how NPC patience decays when a relic sits on the shelf too long. Because each tier (Cheap, Perfect, Expensive, Overpriced) changes both the sell probability and a hidden patience modifier on browsing customers, mispricing by even a handful of coins can flip a routine day into a reputation-damaging one — which is exactly why the Perfect Price stamp and the price list below matter so much for serious shopkeeper play.
-
Cheap relics always sell but cap your income. They are useful for clearing low-tier common drops that have no resale value.
-
Perfect relics always sell at maximum profit and slightly boost customer patience throughout the shop.
-
Expensive relics sometimes sell and sometimes get refused. The gamble can pay off, but it risks reputation loss.
-
Overpriced relics almost never sell and visibly anger customers, hurting your standing and potentially triggering negative events.
The trick is that the difference between Perfect and Expensive is often just a few coins, which is why the stamp is so valuable. Without it, you are guessing. With it, you are pricing with confidence, and that confidence compounds across an entire shift.
| Relic Type | Example Tier | Typical Perfect Price Range | Best Use Case |
|---|---|---|---|
| Common Material | Cheap to Perfect | Low single digits | Clear shelf space fast |
| Mid-Tier Relic | Perfect | Moderate range | Daily bread-and-butter |
| Rare Relic | Perfect to Expensive | High range | Maximize vault haul value |
| Boss Drop | Perfect | Premium range | Single big sale per shift |
Price Memory and the Replay Factor
One subtle aspect of the Moonlighter 2 pricing guide is price memory. Once a customer has been overcharged, they remember it for the rest of the in-game day and may avoid your shop entirely on subsequent visits. This is why the Overpriced tier is so dangerous — it does not just lose one sale, it can lose multiple sales across the day. Conversely, consistently landing Perfect Price stamps builds a quiet loyalty effect, with customers returning more often and buying more aggressively.
The Moonlighter 2 shopkeeper guide mindset is to treat every relic as a test. If you can land the Perfect Price stamp on a relic you have never seen before, you are growing your internal price list in real time. If you misprice it, you are paying tuition for the same lesson. Over the course of a campaign, the players who minimize mispricing are the ones who walk away with the most gold per vault run.
Shop Management: Shelves, Restocks, and Daily Flow
Shop management in Moonlighter 2 is more than setting prices — it is about controlling the physical layout of your shop, the order in which relics are stocked, and the timing of restocks during the shift. According to the official Digital Sun Games page, rebuilding the shop and turning profits into gear is the central loop, with display customization and premium decorations influencing customer behavior. A cluttered shelf sells less than a curated one, even when the prices are identical.
Shelf Layout and Customer Flow
Customers in Moonlighter 2 enter your shop and walk a fixed path. The first relic they see is the one they consider first, and if the price is wrong, they may walk out without browsing the rest. This means the relics closest to the door should be your highest-confidence Perfect Price items — the ones you know will sell and generate a positive reputation spike early in the shift.
Strategic shelf placement in your Moonlighter 2 shop means deliberately routing each customer's gaze toward relics that match your current pricing confidence, since the fixed walking path means every visitor sees front-shelf items first and only lingers on mid- or back-shelf relics if the initial offer feels trustworthy. Front-loading Perfect Price relics near the door banks early reputation and cash, while reserving the counter for premium stock forces browsing customers to pass — and price-check — your mid-tier inventory along the way, lifting average sale value per shift.
-
Front shelf: High-confidence Perfect Price relics that guarantee a sale.
-
Middle shelf: Mid-tier relics you are still learning the price for.
-
Back shelf: Experimental relics where you are willing to risk an Overpriced stamp to discover the Perfect Price.
-
Counter display: Premium relics reserved for the afternoon rush when patient customers are more likely to pay top value.
This is also where Moonlighter 2 shop management becomes a long-term investment. The Blob-Life update, reported by the Steam News hub, added shop upgrades, aromas, and Bloblet companions, all of which modify customer behavior in subtle ways. A well-upgraded shop with the right aromas can turn an Expensive relic into a Perfect Price sale simply by shifting customer mood in your favor.
Restock Timing
Restocking is not a passive action — it is a strategic decision. If you restock too early, you flood the shop with relics before customers have had a chance to see your best items. If you restock too late, you miss the afternoon rush and leave gold on the table. The optimal window is usually mid-shift, after the first wave of customers has cleared the front shelf but before the second wave arrives.
A practical restock checklist helps you lock down the mid-shift window without second-guessing yourself: pull up your price list, scan the front shelf for relics that have already triggered a customer frown or heart-eye reaction, and prioritize swapping in mid-tier stock before the second wave hits — using Perfect Price indicators as your anchor for any price adjustments on underperformers.
-
Clear sold relics from the front shelf and replace with mid-tier inventory.
-
Move any relic that failed to sell during the first wave to the back shelf.
-
Adjust prices on relics that received a frown reaction — either up (if you suspect Perfect Price is higher) or down (if you suspect it is lower).
-
Save your rarest relics for the late-afternoon window when premium customers browse.
Reputation and the Mood Meter
Every customer interaction feeds into an invisible reputation meter. Perfect Price sales boost it, Overpriced refusals drain it, and Cheap sales leave it neutral. A high reputation means more customers, longer browsing times, and a higher tolerance for Expensive pricing. A low reputation means fewer customers, shorter visits, and a stricter pricing tolerance.
| Reputation Level | Customer Volume | Pricing Tolerance | Shop Income |
|---|---|---|---|
| High | Many customers, long visits | Wide (accepts Expensive) | Maximum |
| Neutral | Standard customer flow | Moderate | Average |
| Low | Few customers, quick exits | Narrow (rejects Expensive) | Minimal |
This is why a single Overpriced relic can have an outsized effect. It does not just lose one sale — it chips away at the reputation that makes all your other sales more profitable. The Moonlighter 2 shopkeeper guide philosophy is to protect reputation aggressively, even at the cost of leaving a few coins on the table.
The Perfect Price Economy: Relics, Tiers, and Gold Math
The Moonlighter 2 price list is more than a convenience — it is the foundation of your entire economic engine. The difference between pricing everything Cheap and landing Perfect Price on most relics can be 40-60% more gold per shift, and that gap compounds across dozens of shifts in a full campaign.
Building Your Price List
The fastest way to build a reliable price list is to treat the first encounter with any new relic as a discovery session. Place it on the back shelf, set a high initial price, and watch the customer's reaction. If the Perfect Price stamp appears, record the price. If the customer refuses, drop the price by 10% and try again. Most relics will reveal their Perfect Price within two or three attempts, which means your price list grows by 2-4 entries per shift in the early game.
Community guides report that the following relics tend to have have the widest Perfect Price bands and are the easiest to learn first, so new shopkeepers should prioritize them before attempting trickier inventory: beginner-friendly dungeon loot from the first two vault levels, basic potions and crafting materials sold by traveling merchants, and common mob drops like bones, cloth, and rusted weapons. These items usually have a 15-25% tolerance window around the Perfect Price value, meaning a mid-range asking price will still trigger the stamp roughly 3 out of 5 times, which is forgiving while you calibrate your intuition. Focusing your first 20-30 successful pricings on this category also builds the muscle memory needed for the narrower bands later, and it directly supports the 30-40% Early game accuracy benchmark shown in the table below.
-
Common crafting materials (low risk, low reward).
-
Mid-tier dungeon drops from the first vault.
-
Vendor trash that customers buy for sentimental reasons.
Conversely, the relics with the narrowest Perfect Price bands tend to be boss drops, rare enchantment components, and event-locked relics whose true valuation can sit within a 3-5% window of the asking price, so a single misread shifts the transaction from a perfect stamp to a flat refusal. These items typically become relevant only after the shop has stabilized through the Early game stage, which is why the learning curve table treats them as Late game targets rather than something to experiment with on a first encounter.
-
Boss drops with unique effects.
-
Rare enchantment components.
-
Event-locked relics that only appear during specific in-game conditions.
| Learning Stage | Relics Priced Perfectly | Shift Income (Relative) | Strategy |
|---|---|---|---|
| Early game | 30-40% | 1.0x baseline | Focus on common drops |
| Mid game | 60-75% | 1.4-1.6x baseline | Expand into mid-tier relics |
| Late game | 85-95% | 1.8-2.0x baseline | Cover boss drops and rare finds |
The Relic Tier Connection
Each relic belongs to a tier that loosely corresponds to its Perfect Price ceiling. Tier 1 relics — common materials and basic drops — top out at low single-digit prices. Tier 4 relics — boss drops and event exclusives — can reach prices 20-30x higher. This is where the Moonlighter 2 pricing guide intersects with relic tier knowledge, because knowing which relics are worth the shelf space is half the battle.
The most profitable shifts are the ones where you have a balanced inventory across all four tiers. A shift stocked entirely with Tier 1 relics will sell out quickly but cap your income. A shift with only Tier 4 relics will be slow and risky, because customers may not have enough gold to buy. The sweet spot is a mix that gives the morning crowd affordable options and the afternoon crowd premium targets.
Gold Math: Why the Perfect Price Stamp Is Worth Chasing
To put concrete numbers on the difference: if a relic has a base value of 100 gold, a Cheap sale might net you 60-70 gold, an Expensive sale might net 90-110 gold (if it sells at all), and a Perfect Price sale will reliably net 120-130 gold. Across a shift with 20 relics, that 50-60 gold difference per relic adds up to 1,000-1,200 gold — enough to fund a major town upgrade or a new piece of gear. Over the course of a campaign, the gap between a Cheap-pricer and a Perfect Price-pricer can be tens of thousands of gold.
This is also where shop perks enter the equation. The Greed & Glory update introduced perks that boost Perfect Price payouts specifically, which means a well-built perk loadout can stack on top of already-strong pricing skills. According to the Steam News hub, the 1.0 release further balanced shop income and decoration effects, so the perk economy is now tuned for both new and veteran players.
Advanced Shop Strategies: Perks, Aesthetics, and Long-Term Profit
Once you have the basic Moonlighter 2 shop loop down, the next layer of optimization is the perk system, the aesthetic upgrades, and the long-term economic decisions that separate a good shop from a great one. This is where the Moonlighter 2 shopkeeper guide evolves from daily mechanics into campaign-level strategy.
Shop Perks and How They Stack
Shop perks in Moonlighter 2 are passive bonuses that modify how your shop operates. They are unlocked through progression, purchased with gold, and stack in ways that reward specialization. Some perks boost Perfect Price payouts, others increase customer patience, and a few unlock entirely new shop behaviors like the ability to display relics on mannequins or run limited-time sales events.
A strong perk loadout typically balances three categories: pricing perks that widen your Perfect Price window and increase gold multipliers, customer perks that extend visit frequency and browsing patience for your shop management flow, and inventory perks that expand shelf slots or enable item stacking during restock cycles. Blending all three prevents the common early-game trap of maximizing one category at the expense of bottlenecking another—e.g., cranking pricing bonuses while shelves stay half-empty, or unlocking extra shelf space without enough customer traffic to justify it.
-
Pricing perks that boost Perfect Price payouts or widen the acceptable pricing band.
-
Customer perks that increase visit frequency, browsing time, or spending willingness.
-
Inventory perks that unlock extra shelf space, faster restocks, or the ability to stack items.
| Perk Category | Effect | Synergy |
|---|---|---|
| Pricing | Boosts Perfect Price gold | Stacks with reputation |
| Customer | Increases visit volume | Stacks with decoration |
| Inventory | Expands shelf capacity | Stacks with restock speed |
The most efficient perk builds, according to community testing, front-load pricing perks in the early game (when gold income is tightest) and transition to customer and inventory perks in the mid-to-late game (when visit volume becomes the bottleneck).
Aesthetics, Aromas, and the Bloblet Effect
Aesthetics are not just cosmetic. Premium decorations and aromas directly influence customer behavior, often by subtly shifting their pricing tolerance or visit frequency. The Blob-Life update added Bloblet companions that follow you around the shop and provide small passive bonuses — some boost Perfect Price detection, others increase the chance of a customer becoming a repeat buyer.
Practical aesthetic strategies can compound your shop's revenue potential when applied with intent, since every decoration and aroma in Moonlighter 2 triggers a hidden modifier on customer psychology, pricing tolerance, and visit frequency. Rather than scattering upgrades randomly, treat your floor plan as a layered funnel — anchoring the front shelf with premium visuals, layering mid-shop aromas to soften pricing blowback, and positioning your Bloblet companions in spots where their passive bonuses (Perfect Price hints, repeat-buyer chance) are most likely to fire. This tiered approach turns the Bloblet Effect from a cosmetic afterthought into a measurable pillar of your shop management loop.
-
Place premium decorations near the front shelf to set a high-end tone.
-
Use aromas that boost customer patience during the morning rush.
-
Equip Bloblets that complement your perk loadout rather than duplicating its effects.
-
Rotate decorations seasonally if the game supports limited-time aesthetic events.
Long-Term Economic Decisions
The most underrated part of the Moonlighter 2 pricing guide is the long-term economic planning. Every gold piece you earn is a resource that can be spent on gear, town upgrades, or shop upgrades. The optimal split depends on your playstyle, but most veteran players recommend a roughly 40/30/30 split — 40% to gear, 30% to town upgrades, and 30% to shop upgrades — at least until your shop is fully optimized.
Once the shop is fully upgraded, you can shift more resources toward gear and town upgrades because the shop becomes self-sustaining. This is the late-game economy: your shop funds your gear, your gear lets you clear deeper vaults, and your deeper vaults feed your shop with higher-tier relics. The cycle is self-reinforcing, but only if the Moonlighter 2 shop management is dialed in from the start.
Frequently Asked Questions
What is the Perfect Price stamp in Moonlighter 2?
The Perfect Price stamp is a red visual confirmation that appears when a relic's listed price matches the customer's internal valuation. Landing this stamp guarantees the sale at maximum gold payout and slightly boosts your shop reputation. It is the single most important feedback signal in the entire Moonlighter 2 pricing guide and the main driver of shop profit.
How do I avoid pricing relics as Overpriced in my Moonlighter 2 shop?
Start with a conservative price on any relic you have not seen before, and use the customer's reaction to guide adjustments. The difference between Perfect Price and Overpriced is often only a few coins, so small increments are safer than large jumps. Building a personal Moonlighter 2 price list as you discover new relics will dramatically reduce mispricing over time.
Can I restock my shop mid-shift in Moonlighter 2?
Yes, restocking is allowed and often necessary during longer shifts. The optimal restock window is mid-shift, after the first customer wave has cleared your front shelf but before the afternoon rush. This is also a good time to adjust prices on relics that received negative reactions and to rotate in higher-tier inventory for premium customers.
Do shop decorations actually affect customer behavior in Moonlighter 2?
Yes, premium decorations, aromas, and Bloblet companions all influence customer behavior in measurable ways. They can boost customer patience, widen pricing tolerance, and increase the chance of repeat visits. The Blob-Life update specifically added shop upgrades, aromas, and Bloblet companions, so the aesthetic layer is now a meaningful part of Moonlighter 2 shop management rather than pure cosmetics.
What is the best early-game Moonlighter 2 shopkeeper strategy?
Focus on landing Perfect Price stamps on common and mid-tier relics, which make up the bulk of your daily inventory. Front-load your perk choices into pricing boosts, and use the front shelf for your highest-confidence relics. Save rare and boss drops for the late afternoon when patient customers are willing to pay premium prices, and reinvest early profits into shop upgrades that compound over the rest of the campaign.